Having beautiful travertine in your home or on your patio is fantastic! Whether it’s floors, countertops, or a charming paver patio, keeping it looking fresh often means sealing. It puts a protective shield on your stone.
But some important prep steps come first. Doing these right makes a huge difference in how well your travertine sealing works and how long it lasts.
Knowing these steps will help you get great, long-lasting results. Let's discuss how you can prepare your travertine for sealing.
Getting your travertine ready before sealing is super important if you want it to stay looking great for a long time. It’s not just about applying some sealer - a little prep goes a long way!
From checking for any damage to picking the right sealer and applying it just right, each step helps keep your stone protected and fresh.
Taking your time with these simple steps means less fuss later and a travertine surface you’ll love showing off!
Start by inspecting your travertine carefully. As travertine sealing locks everything in place, it is important to look for any signs of repair.
Inspecting carefully and doing all repairs beforehand will allow the sealing to work well.
For sealing to work well, your travertine needs to be super clean.
Clean stone not only looks great, it lets the sealer work better.
This step is simple but often missed.
Sealing too early causes cloudiness or peeling. Patience here pays off.
Don't apply the sealer on the whole surface. First, test in a small, hidden area.
This will help you know what type of sealer works best. You can also decide by the patch test if one or two coats are needed.
Not all sealers are the same. There are three main types:
For a paver patio, siloxane or acrylic-based sealers are popular. They’re durable and protect well against weather.
If you’re searching for travertine sealing near me, pros can recommend the best option for your stone.
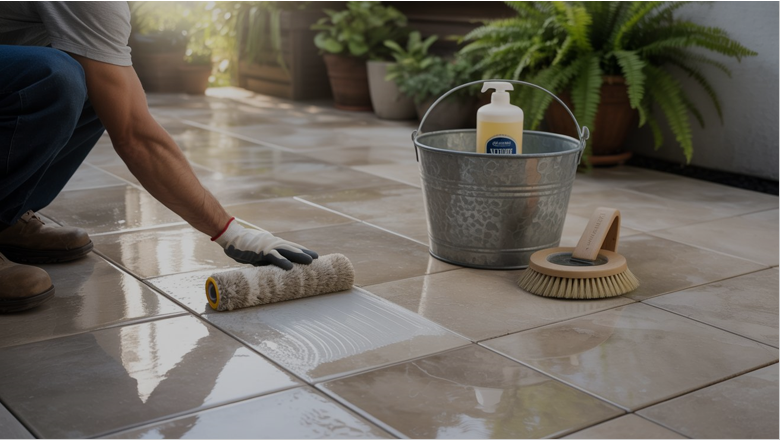
Now it's time to seal.
Here’s the tip: Thin, even coats work better than thick, sloppy ones. More isn’t always better!
Let the sealer cure for 24-48 hours. Avoid heavy foot traffic or wetting the stone during this time.
You can test it by dropping water- if it beads, it’s sealed. If it soaks in, it might need another coat.
Keep your travertine happy:
That’s how travertine stays protected and fresh for years.
Here are some tips to follow during paver patio sealing:
Sealing travertine isn’t something to rush. When it’s done the right way, it really helps protect your stone from stains and wear. Taking a little extra time to prep and pick the right sealer makes a big difference.
Whether it’s inside your home or outside on a patio, good care keeps your travertine looking great and feeling fresh for a long time. It’s all about making your beautiful stone last and shine.

This post has been authored and published by one of our premium contributors, who are experts in their fields. They bring high-quality, well-researched content that adds significant value to our platform.